My friends and I hosted a baby shower a couple weeks ago. We decided to have fortune cookies dipped in chocolate and sprinkles for our favors in honor of Chinese New Year (Feb 14th this year).
While we were putting them together I thought it would be fun to be able to make your own take out box out of whatever scrapbook paper you had on hand, so I made a couple templates to share. Both of them are for a smaller box like I have pictured above, and they will print on a standard sized printer.
1. Outline Only (no program needed). Find some (thicker) scrapbook paper you want to use, cut it down to fit into your printer (about 8.5 inches) and print the outline on the sheet. I would recommend cardstock, or your box is going to be pretty flimsy. Buy double-sided cardstock and your box will be decorative inside as well! This file is saved as a .jpg, so you can just print it as a picture.
Here is another link to download the file: Take-Out Box Outline
2. Template (program needed)
This option is for my fellow digital scrapbookers. The template includes a variety of options.
- There is an outline only layer, so you can print it on paper of your choice. Change the color of the outline to match the paper you have so it will blend in. Buy double-sided cardstock and your box will be decorative inside as well!
- One layer covering the entire template. Clip your digital paper on and turn off the outline layer to print.
- One layer covering all sides of the box. Keep the outline layer on so you know where to cut the flaps. Clip your digital paper on, change the outline color to match your paper, and print. The bottom and the flaps of the box will stay whatever color your paper is.
- Separate side layers. This option is best for paper that is only one direction. For example, if you use paper with words, you don't want the words to be upside down on one side of the box. Clip your digital paper onto these separate side layers and rotate it for each side.
- A layer called "Cut Lines/Dots/Notches". Print these on all the above options, so you can clasp the top flaps together. The dots tell you where to punch your holes for wire/brads/eyelets. The notches are on the two side flaps to tell you where to fold them.
- Finally, there is an instructions layer if you're not sure how to put it together, but I wouldn't recommend printing it on your projects. :)
Here is an alternate link to download the file: Take-Out Box Template
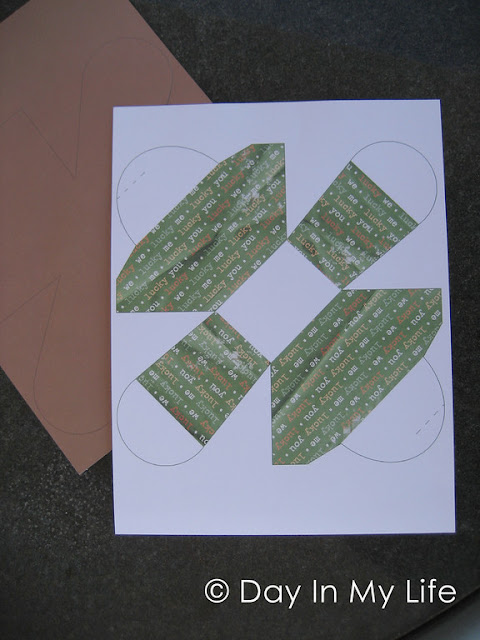
Here's a printed example of my use of the template (white cardstock with green printing), and the outline (brown and green double-sided cardstock):
Click here for a fortune cookie recipe to fill your cute boxes.


Oh my gosh, they turned out so cute! I am totally impressed.
ReplyDeleteThanks for the template, so cute! I'm attempting these for Christmas! :-)
ReplyDeletewow these are great!!
ReplyDeleteI am making several sizes for Easter decorations and place markers!!
thanks,
Julie
Oh my goodness you are AMAZING to think of this, and to share!!! THANK YOU !!!
ReplyDeleteTiff, hi
ReplyDeleteI wonder what kind of printers you have... :)
do you also have a plastic covering machine to laminate which I saw here: http://tiffkeetch.blogspot.com.tr/2010/09/picture-matching-book.html
Hey Ayse!
DeleteI just have an old HP all-in-one (scanner, printer, copier). It still does the job! I do also have a laminating machine - it's made by Scott and it cost me about $25 at Wal-Mart (or Amazon has it too). I buy more sheets for it on amazon from Lamination Depot. :)
Thank you for these templates - I will use them for my sons's birthday parties (the both want a ninjago party).
ReplyDeleteGreetings from Germany!
Miri