For my third annual Snowman Party, I decided to change things up a bit. Instead of just doing it with my nieces and their friends, I made up some invites and hosted the party here with Harvey's friends (and their moms - my friends).

Anyway, funny story: I strapped Harvey in his car seat and headed out to deliver the invites. I drove up to the first house, left the car running, and ran up to the door. As I came back to the car and started backing up... Harvey started freaking out. He realized that we were at his little friend's house and wanted to stay and play. Imagine his horror when we had several other similar stops!
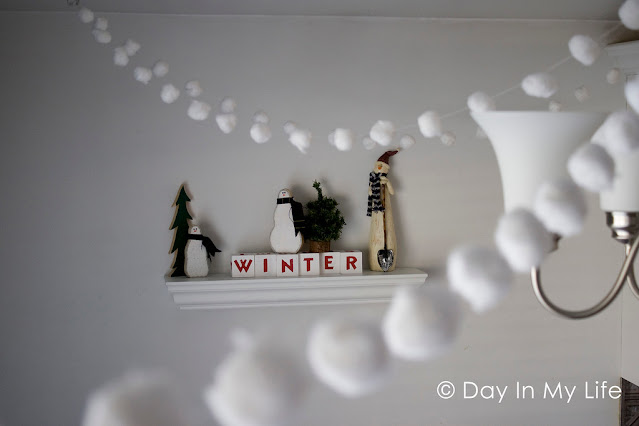
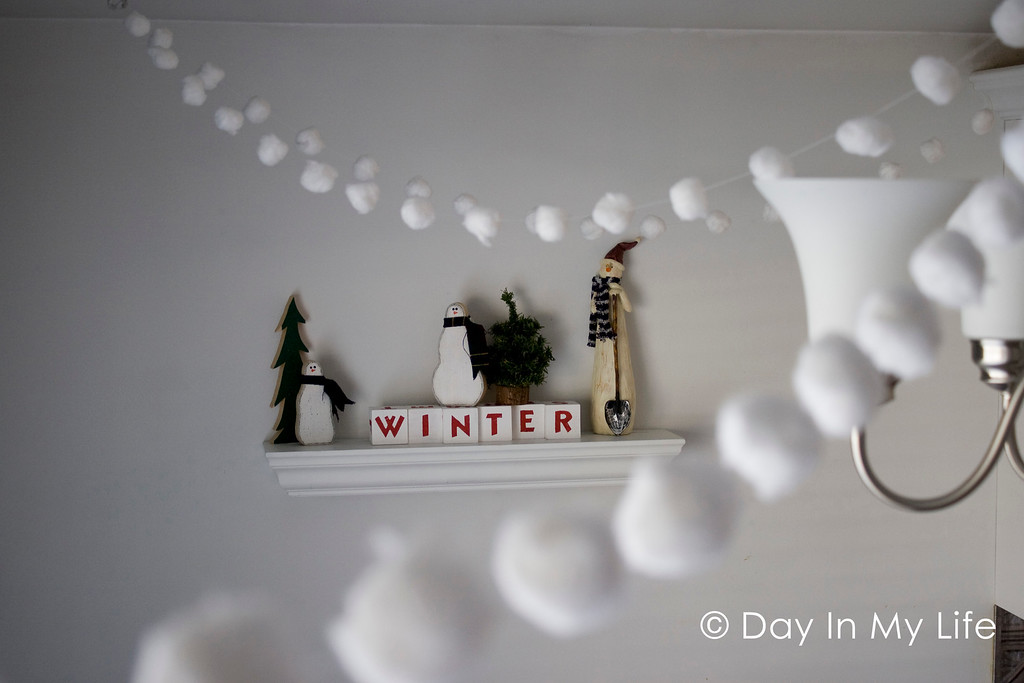
For decorations, I wanted to keep everything clean and simple. I mean, snow is beautiful in its own right, so why shy away from that? Plus the cheezy snowmen I've collected throughout the years were already on display.
I made up a cute (easy) little garland out of thread and cotton balls...
I stuck with blue and orange as my colors, and I think it made for a really classy color scheme!
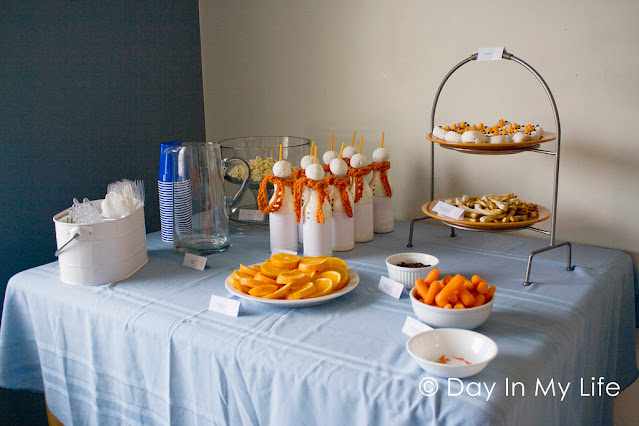
We had Snowman Smiles (orange slices), Snowman Noses (mini carrots), Eyes and Buttons (chocolate chips), Snow (popcorn), Liquid Snow (milk), and Snow Dusted Branches (pretzels dipped in white chocolate):
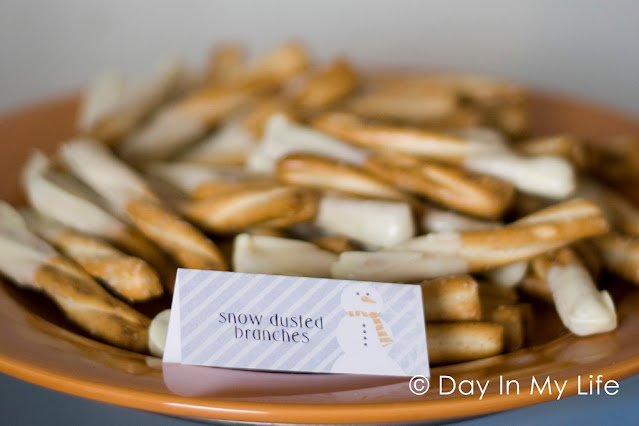
I used Braided Twists and they turned out SO yummy!
I also made up a few snowmen...
I used mini powdered donuts, molded half of a circus peanut into a nose and carefully fitted it in the center, and added the eyes and mouth with black decorating gel. Aren't they adorable?

For decorations, I wanted to keep everything clean and simple. I mean, snow is beautiful in its own right, so why shy away from that? Plus the cheezy snowmen I've collected throughout the years were already on display.
I made up a cute (easy) little garland out of thread and cotton balls...
I stuck with blue and orange as my colors, and I think it made for a really classy color scheme!

We had Snowman Smiles (orange slices), Snowman Noses (mini carrots), Eyes and Buttons (chocolate chips), Snow (popcorn), Liquid Snow (milk), and Snow Dusted Branches (pretzels dipped in white chocolate):

I used Braided Twists and they turned out SO yummy!
I also made up a few snowmen...

And to drink... what else? More snowmen!

**Just a tip. Buy the chugs with the shrink-wrapped labels instead of sticky ones. I bought mine on sale, and tried to remove the sticky labels... and after driving to 3 different stores in search of Goo Gone my hubby told me just to stick white paper around them. It would have been so much easier just to cut the shrink-wrapped labels off!**
I didn't have time to draw faces on these guys before this party, but I did get faces on the snowmen for my niece's party... I think both are darling:

We also had our traditional Melted Snowman Soup (potato chowder):

Throw the Snowballs in the Bucket:


But for my nieces' party, I set out three small buckets and the girls could earn 1, 2 or 3 points depending on the bucket. I thought it might be too simple for them, but they loved it just as much!
I made the snowballs out of white nylons with polyfill inside. I just tied a couple of tight knots on either end. I can invision many indoor "snowball fights" with these babies in the future.
Pin the Nose on the Snowman:

and Whipped Cream Snowmen:

Seriously.. this party was a blast. I had lots of fun preparing everything, and more fun mingling with my friends on the day of the party. Thanks gals for coming!
What a fun party idea!
ReplyDeleteI'm so sad we missed it. Next time I have to chose between a Keetch party or surgery, I'm going to the party!
ReplyDeleteI didn't know you that you crochet. I did in my former life, which is before kids.
Thanks for being so creative! It makes life fun for all.
That is such a great idea! You are going to do very well with your party planning business. I never would have thought of this, it's darling!!
ReplyDeleteAre you not just the most creative person EVER?! This is adorable! Great job, your business is going to ROCK!
ReplyDeleteDrew just saw the whipped cream snowman and said, "I didn't make one of those!!!" We had a great time! Thanks!
ReplyDeleteLove it!!! I love the simplicity of the invites. I LOVE the cotton ball garland. I may have to use that sometime.....hmmmm....do you think they'd be good spray painted for other seasons? Or maybe just toss them in a bowl of dyed water....I love the milk bottles and the doughnuts. I just saw these snowmen bottles somewhere....bakarella? Can't remember now. Very nice work!
ReplyDeletetotally PRECIOUS. i ADORE the snowmen milk/drink bottles, precious. Well Done!
ReplyDeleteWhat a great idea!!! I love it all - so cute! The snowball garland is genius!
ReplyDeleteoh I love it all. everything is so cute and the activities are fantastic! I popped over from hannah's blog
ReplyDeleteWe had so much fun Tiff! Everything was adorable and the soup was delicious! I love your cotton ball garland photo! Really nice.
ReplyDeleteYou are so fun and crafty!! Sorry we couldn't make it. Hopefully next year!
ReplyDeleteYou are talented! I love everything about this party!
ReplyDeleteI have nominated you for the stylish blogger award so feel free to hop on over and get your stylish blogger sidebar button!
http://vintageskye.blogspot.com/2011/02/my-first-blog-award.html