
How to Fold a Fitted Sheet

In my spare time, I'm a massage therapist. Now, I've cut back quite a bit on my hours because of tending my nieces and staying home with my son, but just imagine how many sheets I've folded in the last six years. I've gotten pretty good at folding flat and fitted sheets alike.

Plus.. I'm sort of a perfectionist, and there is nothing like looking at your linen closet when all the sheets and towels look like the inside of a catalog. So, here's the technique (I'm folding a crib sheet here for ease of taking photos, but any size sheet works exactly the same).

1. Find the two seams on one end of a fitted sheet, and match them up - wrong side together.


2. While holding these two seams with your left hand, glide your right hand along the right edge (my thumb is touching it in the photo above) of the sheet until you find another seam and match it with the others. Do the same thing - pinch the three seams together with your left hand and use your right hand to glide along the edge until you find the last seam. Match it with the 3rd seam - wrong sides together. You should now have the two ends of your sheet as two "loops" with all of the seams matching up.


3. While pinching the seams together, glide your other hand with one finger between seams 2 and 3 along the edges until it comes to the loop where the sheet is folded in half. Straighten out the edges and shake it a bit and it should fall into a nice quarter fold.

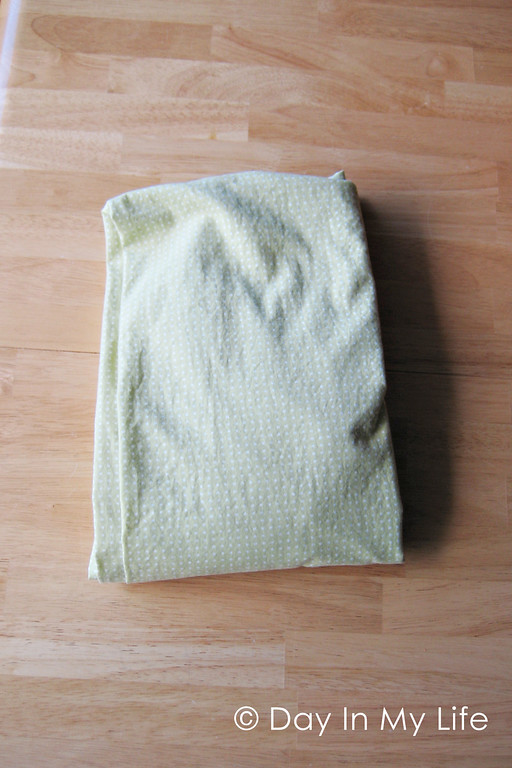
4. Lay your sheet on a table or bed in a rectangle shape with the elastic curving around on the top.


5. Fold the sheet lengthwise in thirds bringing each side toward the center. (I only folded the crib sheet in half).

6. Fold your sheet width-wise 3 or 4 times depending on the depth of your linen shelves, bringing the top and bottom toward the center.


And you're done! Happy linen closets everyone! It's so much easier to do it than it is to explain it - so hopefully I made sense. If you're confused, leave a comment.

Comments

  1. No Lie - but I was changing my sheets this morning and thinking to myself "How in the heck do you fold a fitted sheet?" LOL Thanks for the info! You're the best!!!

    ReplyDelete
  2. You have earned the title super hero! Amazing. My closets will look so much better because of this post. Thanks.

    ReplyDelete

Post a Comment

Popular posts from this blog

This Much Card and a Kid Canvas

Father's Day ideas continued... I decided to show you the things Harvey and I made to give to Justin. First up... "I Love You This Much Card": It's super easy... 1. Trace your child's hand, then cut out two copies. My paper was double sided so I made sure that when the thumbs match up - the yellow side would be inside, and the blue side would be outside. 2. Cut out a strip of paper and fold it accordion style. Use letter rub-ons or stickers to add the words "I Love You" on the outside, and "This Much" on the strip of paper.  3. Glue the ends of your accordion strip on the insides of the hands and your card is done. :) Kid Canvas: Then Harvey and I made a little canvas (4 inches x 4 inches) to hang on the wall in Justin's office at work. I purchased small ones so we could add to them each year and hang them in one grouping. I prepainted the canvas in green, then set Harvey in the bathtub with blue paint and

Thinkin' About Dad

So.. Father's Day is in 10 days. Yeah - already. Here are a few ideas for you... Shirt Card: All you need are two papers, and two buttons. 1. Cut one paper into a piece 4 inches by 11 inches. Fold it in half so you have a card base that opens "up" and measures about 4 inches wide by 5.5 inches tall. 2. Measure one inch from the fold and draw a line 3/4 inches toward the center on both sides of your card.  Use scissors to cut through both papers at the marks. 3. Fold these pieces in to the center of the card, so the top corners meet in the middle. 4. Download this tie pattern... Here is an alternate link to download the file: Shirt Card Template ...and use it to trace and cut a tie out of your second paper. Glue your tie in the center of the card. 5. Add buttons to the collar to make it more realistic. (Or, if you want to do it digitally, go here to download an awesome template from ScrapMatters.com) Here are some clutter-free Father's Day gif

DIY Canvas Car Playmat

So, my baby turned two yesterday. And I just KonMaried my house and I am SO. OVER. the toys. And the kid clutter. Plus he has both a big brother and a big sister, and they have toys that cover all the basics. But we still have loads of birthdays and Christmases in our future, so what in the world am I going to give? Anyway, my internal brain rant ended when I came up with this idea. It meets all of my current criteria: It is durable.  It is open-ended and fosters imaginative play. It folds up small and can be stored with like-items in our toy storage system. It encourages cooperative play. My hubby had a mat like this one when he was a kid, so I asked my mother-in-law to give me some details on how to make our own. I bought 60 inches x 45 inches of duck canvas and ran a zigzag stitch down the raw edges. Then, (after planning out the city on graph paper measured and accurately scaled proportionately, then folding the canvas to help rescale my plan) I drew in the c