
Candy Heart Centerpiece

I put together this simple centerpiece for Valentine's Day. Hopefully, I'll get some real flowers to replace the fake ones on the 14th. Anyway, if you want to put one together, here's the how-to:


1. Get two vases: one a little thinner than the other, and both about the same height. Set the smaller one inside.


2. While holding the smaller vase in place, pour conversation hearts in the space between the vases. You could also use red hots for an all red display. (Or get creative.. you could use this idea for just about any holiday and small candy.)


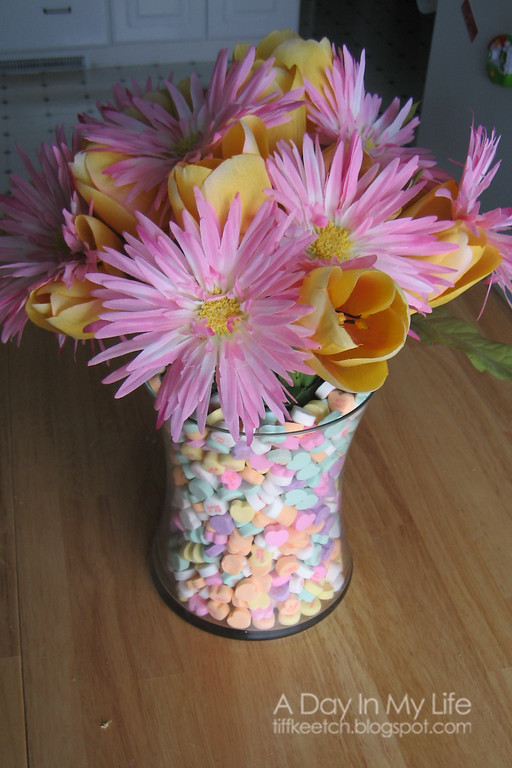
3. Add water and flowers. Or just fake ones. :)

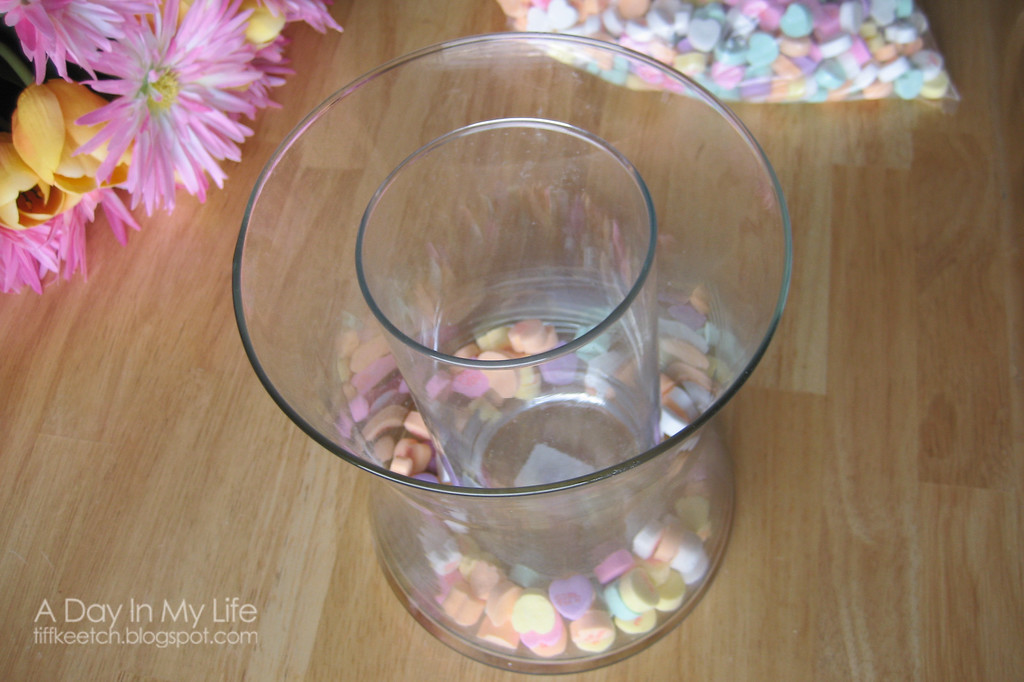
*Disclaimer* You might want to purchase the candy this year for next's year's display. The stale candy might not slowly disappear.

Comments

Post a Comment

Popular posts from this blog

This Much Card and a Kid Canvas

Father's Day ideas continued... I decided to show you the things Harvey and I made to give to Justin. First up... "I Love You This Much Card": It's super easy... 1. Trace your child's hand, then cut out two copies. My paper was double sided so I made sure that when the thumbs match up - the yellow side would be inside, and the blue side would be outside. 2. Cut out a strip of paper and fold it accordion style. Use letter rub-ons or stickers to add the words "I Love You" on the outside, and "This Much" on the strip of paper.  3. Glue the ends of your accordion strip on the insides of the hands and your card is done. :) Kid Canvas: Then Harvey and I made a little canvas (4 inches x 4 inches) to hang on the wall in Justin's office at work. I purchased small ones so we could add to them each year and hang them in one grouping. I prepainted the canvas in green, then set Harvey in the bathtub with blue paint and

Thinkin' About Dad

So.. Father's Day is in 10 days. Yeah - already. Here are a few ideas for you... Shirt Card: All you need are two papers, and two buttons. 1. Cut one paper into a piece 4 inches by 11 inches. Fold it in half so you have a card base that opens "up" and measures about 4 inches wide by 5.5 inches tall. 2. Measure one inch from the fold and draw a line 3/4 inches toward the center on both sides of your card.  Use scissors to cut through both papers at the marks. 3. Fold these pieces in to the center of the card, so the top corners meet in the middle. 4. Download this tie pattern... Here is an alternate link to download the file: Shirt Card Template ...and use it to trace and cut a tie out of your second paper. Glue your tie in the center of the card. 5. Add buttons to the collar to make it more realistic. (Or, if you want to do it digitally, go here to download an awesome template from ScrapMatters.com) Here are some clutter-free Father's Day gif

DIY Canvas Car Playmat

So, my baby turned two yesterday. And I just KonMaried my house and I am SO. OVER. the toys. And the kid clutter. Plus he has both a big brother and a big sister, and they have toys that cover all the basics. But we still have loads of birthdays and Christmases in our future, so what in the world am I going to give? Anyway, my internal brain rant ended when I came up with this idea. It meets all of my current criteria: It is durable.  It is open-ended and fosters imaginative play. It folds up small and can be stored with like-items in our toy storage system. It encourages cooperative play. My hubby had a mat like this one when he was a kid, so I asked my mother-in-law to give me some details on how to make our own. I bought 60 inches x 45 inches of duck canvas and ran a zigzag stitch down the raw edges. Then, (after planning out the city on graph paper measured and accurately scaled proportionately, then folding the canvas to help rescale my plan) I drew in the c